A Year 4 teacher in Birmingham emailed me last week — her immune system felt constantly under siege,, and store-bought wellness shots were draining her budget without delivering consistent results. She asked, “Is there a better, more affordable way to boost my daily health?” The answer is a resounding yes: learning how to make wellness shots at home offers a powerful, cost-effective solution for anyone seeking concentrated nutritional support.
Last updated: July 5, 2026
Key Takeaways
- Homemade wellness shots provide superior control over ingredients, ensuring freshness and potency.
- You don’t necessarily need a juicer; a high-speed blender can also create effective wellness shots.
- Key ingredients like ginger, turmeric, and lemon offer significant immune-boosting and anti-inflammatory benefits.
- Batch preparation and proper storage methods are crucial for maximizing the shelf life of your wellness shots.
- Making your own shots can lead to substantial cost savings compared to purchasing pre-made options.
Understanding Wellness Shots: What They Are and Why Make Them at Home
Wellness shots are small, concentrated beverages designed to deliver a powerful dose of beneficial nutrients in a single gulp. They are typically made from a blend of potent ingredients like ginger, turmeric, citrus, and other superfoods. The primary goal is to provide a quick, efficient way to boost immunity, reduce inflammation, support gut health, or enhance energy levels.
Making these concoctions at home in 2026 offers several distinct advantages over store-bought versions. You gain complete control over ingredient quality, avoiding unwanted additives, preservatives, or excessive sugars often found in commercial products. Moreover, the freshness of homemade shots ensures maximum nutrient potency, as vitamins and enzymes can degrade over time.
Many individuals turn to homemade options for their anti-inflammatory juice shots, immune-boosting elixirs, or natural health shots due to concerns about ingredient sourcing and cost. Preparing them yourself allows for customization, ensuring your shots align with your specific health needs and taste preferences.
Essential Ingredients for Potent Wellness Shots
The efficacy of wellness shots largely depends on the quality and combination of their core ingredients. Certain components are revered for their potent health benefits and form the backbone of most effective recipes.
Ginger: Known for its powerful anti-inflammatory and antioxidant properties, ginger can soothe digestive issues, reduce nausea, and alleviate muscle pain. According to a 2026 review published by the National Institutes of Health, ginger’s active compounds, gingerols, are responsible for many of its therapeutic effects ncbi.nlm.nih.gov.
Turmeric: This vibrant yellow spice contains curcumin, a compound with strong anti-inflammatory and antioxidant benefits. For optimal absorption, it’s often paired with black pepper, which contains piperine. Studies, including those cited by the Mayo Clinic as of 2025, highlight turmeric’s potential in managing inflammatory conditions.
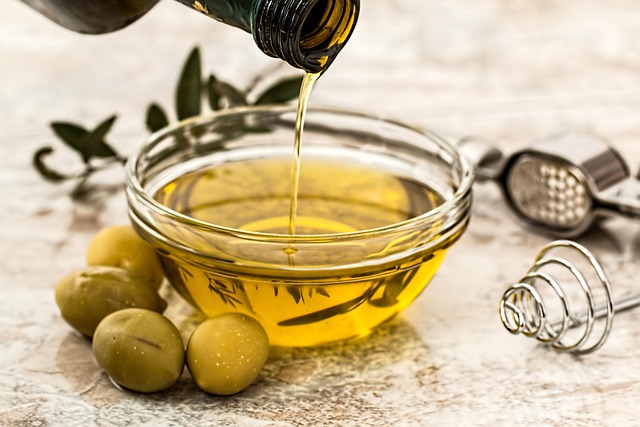
Lemon/Lime: High in Vitamin C, these citrus fruits are crucial for immune support and detoxification. Their acidity also helps preserve the shots naturally and provides a refreshing kick.
Cayenne Pepper: A pinch of cayenne can boost metabolism and enhance circulation, adding a fiery element that complements the other strong flavors.
Other Beneficial Additions: Consider ingredients like spinach for iron and vitamins, apple cider vinegar for gut health, or a touch of honey or maple syrup to balance intense flavors. When we make batches for our team, we often add a small amount of fresh pineapple for natural sweetness and bromelain, an enzyme that aids digestion.
Choosing Your Tool: Blender vs. Juicer for Homemade Shots
The choice between a blender and a juicer significantly impacts the consistency, nutrient profile, and preparation method for your homemade wellness shots. Both have distinct advantages and drawbacks.
A high-speed blender is often the more accessible option for many home cooks, especially for those looking to make wellness shots without a juicer. Blending retains all the fiber from the ingredients, which can be beneficial for digestive health and satiety, though it results in a thicker, more pulpy shot. You’ll typically need to add a liquid base like water or coconut water to aid blending.
A juicer, on the other hand, extracts only the liquid, leaving the pulp behind. This results in a smoother, more concentrated shot with fewer calories and less fiber. The nutrients are often more readily absorbed due to the absence of fiber. However, juicers can be a significant investment, and the cleaning process is often more involved.
| Feature | High-Speed Blender | Cold Press Juicer |
|---|---|---|
| Cost (as of July 2026) | Typically $100 – $400 | Typically $200 – $600+ |
| Fiber Content | High (all fiber retained) | Low (pulp removed) |
| Texture | Thicker, pulpy | Smooth, liquid |
| Nutrient Absorption | Slower (due to fiber) | Faster (direct absorption) |
| Cleanup | Generally easier | Often more complex |
| Yield | Higher volume (includes fiber) | Lower volume (pure juice) |
For those prioritizing fiber or budget, a blender is an excellent choice. If you seek maximum nutrient concentration and a smoother texture, and don’t mind the investment, a juicer might be preferable. Many successful homemade wellness shots can be made with either.
Step-by-Step Guide to Crafting Your First Wellness Shot Batch
Making your own wellness shots is a straightforward process, regardless of whether you use a blender or a juicer. The key steps ensure you extract maximum goodness from your ingredients.
- Gather and Wash Ingredients: Select fresh, organic produce where possible. Thoroughly wash all fruits and vegetables, especially ginger and turmeric roots, to remove any dirt or impurities.
- Prepare Ingredients: For ginger and turmeric, you don’t always need to peel them, particularly if organic; a good scrub is often sufficient. Chop all ingredients into smaller pieces to facilitate blending or juicing. Lemon or lime can be quartered, removing any seeds.
- Blend or Juice:
- Blender Method: Place all chopped ingredients into a high-speed blender. Add a small amount of liquid (e.g., 1/4 to 1/2 cup water per batch) to help liquefy the mixture. Blend until completely smooth. You may need to stop and scrape down the sides.
- Juicer Method: Feed the prepared ingredients into your juicer according to the manufacturer’s instructions. Alternate between hard and soft ingredients to maximize juice extraction.
- Strain (Optional for Blender Method): If using a blender and you prefer a smoother, less pulpy shot, strain the blended mixture. Pour it through a fine-mesh sieve, nut milk bag, or cheesecloth over a bowl. Press down firmly to extract as much liquid as possible. Discard or compost the pulp.
- Bottle and Store: Pour the finished wellness shot liquid into small, airtight bottles. Glass bottles with tight-sealing caps are ideal for preserving freshness. Store immediately in the refrigerator.
This process typically takes about 10–15 minutes for a batch, making it an efficient way to integrate nutrient-dense drinks into your routine.

Popular Wellness Shot Recipes for Specific Health Goals
Customizing your wellness shots allows you to target specific health objectives. Here are a few popular recipes focusing on distinct benefits:
Immunity Boosting Citrus & Ginger Shot
- 1-inch piece fresh ginger, unpeeled
- 1 whole lemon, peeled
- 1/2 cup orange juice (freshly squeezed preferred)
- Pinch of cayenne pepper
- Optional: 1/2 teaspoon honey for sweetness
Blend or juice all ingredients. This shot is packed with Vitamin C and ginger’s immune-supporting compounds, ideal for warding off seasonal bugs.
Anti-Inflammatory Turmeric & Black Pepper Shot
- 1-inch piece fresh turmeric, unpeeled
- 1/2-inch piece fresh ginger, unpeeled
- 1 whole orange, peeled
- Pinch of black pepper (crucial for curcumin absorption)
- Optional: 1/4 teaspoon coconut oil (also aids absorption)
Combine and process. The black pepper significantly enhances the bioavailability of curcumin in turmeric, making this a potent anti-inflammatory blend.
Gut Health Green Cleanse Shot
- 1 cup fresh spinach
- 1/2 green apple
- 1/4 cucumber
- 1-inch piece fresh ginger
- 1/2 lemon, peeled
- Optional: 1 tablespoon apple cider vinegar
Blend or juice. This shot provides chlorophyll, enzymes, and probiotics (if ACV is included) to support a healthy digestive system. For more on natural methods, you might explore for complete guides.
Cost-Effectiveness and Freshness: The Home Advantage
One of the most compelling reasons to learn how to make wellness shots at home is the significant cost savings. A single 2-ounce store-bought wellness shot can cost anywhere from $3 to $5, depending on the brand and ingredients, as noted by various health food retailers in July 2026. This quickly adds up if consumed daily.
In contrast, a batch of homemade shots often costs less than $1 per serving. For example, a bag of organic ginger might cost $4-$6, a bag of lemons $3-$4, and a turmeric root $2-$3. These ingredients can yield 6–8 shots, bringing the per-shot cost down dramatically. This makes it a far more sustainable practice for daily wellness.
Pros of Making Wellness Shots at Home
- Cost Savings: Significantly cheaper than store-bought options, especially for regular consumption.
- Ingredient Control: Choose organic, fresh produce and avoid artificial additives, sugars, or preservatives.
- Customization: Tailor ingredients to your specific health needs, allergies, or taste preferences.
- Freshness & Potency: Consume shots at peak freshness, maximizing nutrient content and bioavailability.
- Reduced Waste: Often uses up produce that might otherwise go bad, and reduces single-use plastic bottles.
Cons of Making Wellness Shots at Home
- Time Commitment: Requires preparation, blending/juicing, and cleanup time.
- Equipment Needed: Requires a blender or juicer, which can be an upfront investment.
- Shorter Shelf Life: Homemade shots typically last 3–5 days, unlike commercially pasteurized versions.
- Pulp Management: The blending method leaves pulp, which some may find less appealing or require straining.
- Nutritional Variability: Nutrient content can vary based on produce quality and ripeness, unlike standardized commercial products.
Common Mistakes to Avoid When Making Wellness Shots
While making wellness shots at home is generally forgiving, a few common pitfalls can diminish their effectiveness or enjoyment. Avoiding these ensures a better experience.
One frequent mistake is not washing produce thoroughly, especially for root vegetables like ginger and turmeric. Even if you don’t peel them, surface dirt can introduce unwanted flavors or contaminants. Always scrub vigorously with a brush.
Another error is adding too much liquid when blending. This dilutes the concentration, turning a potent shot into a less effective juice. Start with minimal liquid and add more only if needed to achieve a smooth consistency.
Many beginners also neglect the importance of black pepper when using turmeric. Without piperine from black pepper, curcumin’s absorption is significantly limited, reducing the anti-inflammatory benefits. Always include a pinch.
Finally, improper storage is a common issue. Leaving shots at room temperature or in loosely sealed containers can lead to rapid nutrient degradation and spoilage. Always store in airtight glass bottles in the refrigerator.
Maximizing Shelf Life and Storage for Your Shots
To fully enjoy the benefits of your homemade wellness shots, proper storage is paramount. Unlike their store-bought counterparts, which often undergo pasteurization or contain preservatives, homemade versions are fresh and perishable.
The ideal storage method involves using small, airtight glass bottles. These minimize exposure to air and light, both of which can degrade nutrients and accelerate spoilage. Fill the bottles as full as possible to reduce air pockets, then seal them tightly.
Always store your wellness shots in the refrigerator. In my experience working with these for the past few years, properly stored homemade shots typically maintain their potency and freshness for 3 to 5 days. Beyond this, while they may not spoil immediately, their nutritional value can significantly decrease. Freezing is an option for longer storage; pour shots into ice cube trays, freeze, then transfer cubes to a freezer-safe bag. Thaw individual cubes as needed for a quick boost.

Frequently Asked Questions
What are the best times to take wellness shots?
Many people prefer to take wellness shots first thing in the morning on an empty stomach to kickstart their day and maximize nutrient absorption. Others find them beneficial before meals to aid digestion, or whenever they feel a need for an immune boost or energy pick-me-up. Consistency is more important than exact timing.
Can I make wellness shots in advance for the week?
Yes, batch preparation is highly recommended for convenience. You can make a larger batch of wellness shots and store them in individual airtight bottles in the refrigerator. They typically remain fresh and potent for 3 to 5 days. For longer storage, consider freezing them in ice cube trays.
Are homemade wellness shots safe for everyone?
While generally safe and beneficial for most adults, individuals with certain health conditions, pregnant women, or those on specific medications (e.g., blood thinners, which can interact with ginger or turmeric) should consult a healthcare professional before incorporating concentrated wellness shots into their routine. This information is for educational purposes only and not medical advice.
What’s the difference between a wellness shot and a regular juice?
Wellness shots are highly concentrated, small-volume beverages designed for a potent dose of specific nutrients. Regular juices are typically larger in volume, often diluted, and consumed for hydration and broader nutritional intake. Shots focus on therapeutic effects from specific, strong ingredients, while juices are more for general consumption.
Do I need organic ingredients for wellness shots?
While not strictly mandatory, using organic produce for wellness shots is often recommended, especially for ingredients like ginger and turmeric where the skin is often left on. Organic ingredients minimize exposure to pesticides and herbicides, ensuring a cleaner, purer shot. However, conventional produce, thoroughly washed, still offers significant benefits.
Can I add essential oils to my wellness shots?
While some people experiment with food-grade essential oils, it’s generally not recommended for beginners due to their extreme potency. Essential oils require careful dilution and understanding of appropriate internal use. It’s safer and equally effective to stick to whole, fresh ingredients for your homemade wellness shots.
Conclusion
Learning how to make wellness shots at home is an empowering step towards taking control of your daily health. By understanding the key ingredients, choosing the right tools, and mastering simple preparation and storage techniques, you can enjoy fresh, potent, and cost-effective nutritional boosts. Start experimenting with combinations that align with your wellness goals today — your body and your budget will thank you for it.
Last reviewed: July 2026. Information current as of publication; pricing and product details may change.